It usually happens at the worst possible moment. You’re getting ready for an important meeting, a wedding, or a dinner reservation when you notice a button hanging by a single thread—or worse, missing entirely. Suddenly, a perfectly good shirt, coat, or pair of trousers feels unwearable over something so small.
Learning how to sew a button is one of those timeless life skills that pays off far beyond the few minutes it takes to master. Instead of replacing clothing or paying for simple repairs, you can restore garments yourself with minimal tools and a little patience. More importantly, knowing how to attach a button properly helps extend the life of your wardrobe, reduces waste, and encourages a more sustainable approach to clothing care.
You don’t need to be an experienced tailor or own an elaborate sewing kit to succeed. Whether you’re repairing a favorite dress shirt, replacing a missing coat button, or reinforcing loose buttons before they fall off, the process is surprisingly straightforward. Once you understand the basic techniques, you’ll have a practical skill that serves you for years to come.
Why Learning to Sew a Button Still Matters
In a world where fast fashion often encourages replacing damaged clothing, simple repair skills have become increasingly valuable.
Buttons endure constant stress. Every time you fasten a shirt, button a jacket, or sit down while wearing trousers, the thread holding each button experiences tension. Over time, even well-made garments develop loose buttons that eventually detach.
Replacing a button not only restores functionality but also preserves garments that may have sentimental value or represent a significant investment.
This small repair also supports sustainability. Extending the life of clothing reduces textile waste, lowers replacement costs, and encourages thoughtful consumption rather than unnecessary disposal.
A basic sewing skill can make a noticeable difference both financially and environmentally.
Understanding Different Types of Buttons
Before learning how to sew a button, it’s helpful to recognize that not all buttons are attached in the same way.
The most common style is the flat button, which typically contains either two or four holes through which thread passes directly.
Shank buttons differ because they include a small loop or raised attachment on the back rather than visible holes. This design naturally creates space between the button and fabric, making it ideal for thicker garments such as coats and blazers.
Decorative buttons may feature unique shapes, materials, or finishes but generally follow one of these two attachment methods.
Identifying the button type before beginning ensures you use the appropriate sewing technique.
Tools You’ll Need
One reason button repair remains so accessible is that it requires very little equipment.
A basic sewing needle, matching thread, sharp scissors, and the replacement button are usually all that’s necessary.
If the original button is missing, many clothing manufacturers include spare buttons attached to interior garment labels or small accessory packets.
A thimble can provide additional comfort when pushing the needle through thicker fabrics, although many people complete simple button repairs without one.
Good lighting also makes the process easier, particularly when working with dark fabrics or small buttons.
Preparing the Garment
Preparation often determines how secure the finished repair will be.
Begin by locating the original stitching marks if the button has fallen off completely. These small holes indicate the button’s original position and help maintain proper alignment.
If loose threads remain, trim them neatly rather than sewing over damaged thread.
Check the corresponding buttonhole to ensure it hasn’t stretched or torn. Repairing the button without addressing a damaged buttonhole may shorten the lifespan of the repair.
Thread the needle with approximately 18 to 24 inches of thread and tie a secure knot at the end.
Taking a few extra moments to prepare carefully makes the sewing process smoother and more accurate.
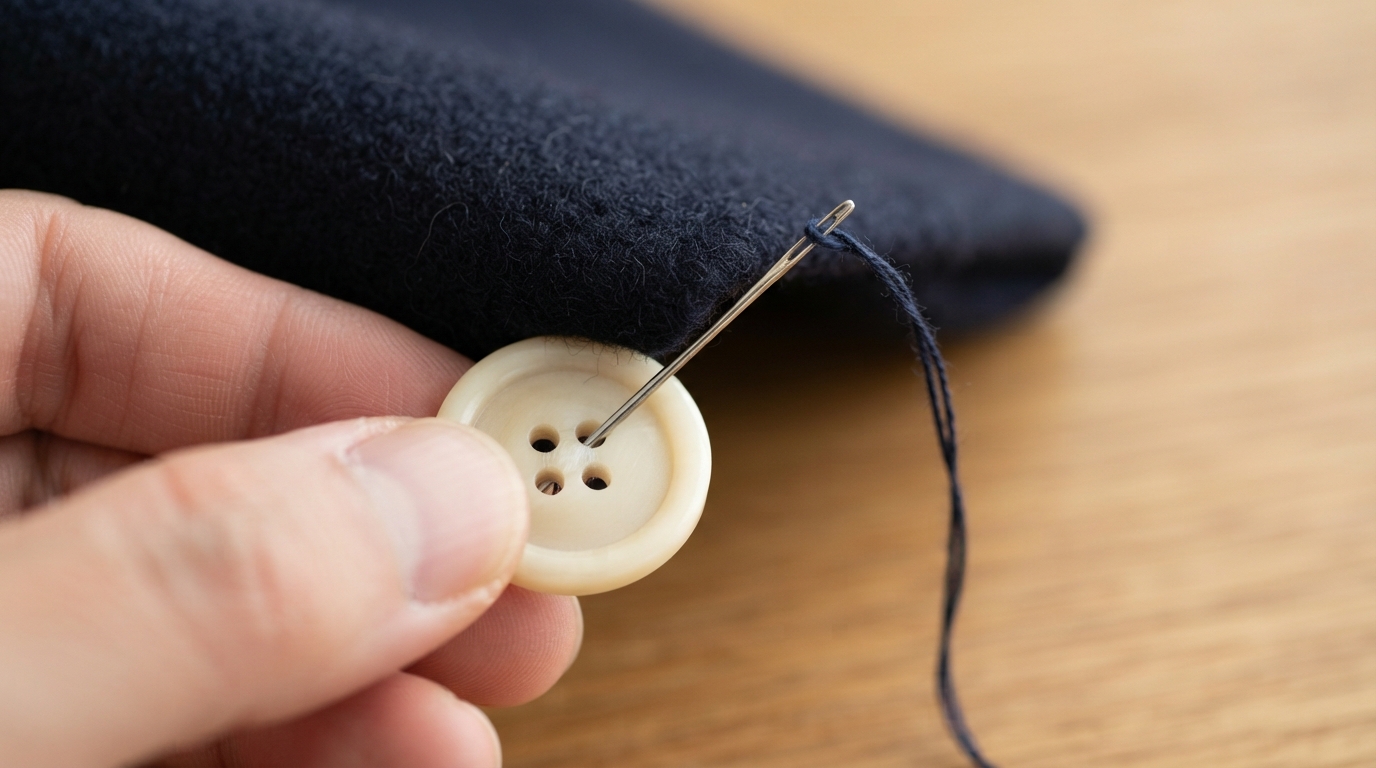
How to Sew a Button with Two Holes
Learning how to sew a button usually begins with the classic two-hole design.
Position the button over the original stitching marks.
Starting from the inside of the garment, push the needle upward through one hole in the button. Pull the thread completely through until the knot rests securely against the fabric.
Next, insert the needle downward through the second hole and back through the fabric.
Continue repeating this motion several times until the button feels firmly attached.
Avoid pulling the thread excessively tight. Buttons need a slight amount of movement so fabric can comfortably fit beneath them when fastened.
Once satisfied, secure the thread on the underside of the fabric with several small knots before trimming the excess.
Sewing a Four-Hole Button
Four-hole buttons follow the same basic principles but provide additional stability.
Many garments use either parallel stitches or a crossed “X” pattern across the four holes.
Whichever pattern you choose, consistency is more important than style.
Begin by sewing through one pair of holes several times before repeating the process with the second pair.
Maintaining even tension throughout creates a balanced appearance while distributing stress more evenly across the button.
Four-hole buttons are especially common on shirts, uniforms, children’s clothing, and casual garments because they offer excellent durability.
Creating a Thread Shank
Some garments require a small amount of space between the button and the fabric.
Heavy jackets, coats, and thick shirts often need extra room so the fabric layers can fit comfortably beneath the fastened button.
Professional tailors achieve this by creating a thread shank.
After making several stitches through the button, wrap the remaining thread several times around the stitches between the button and fabric before tying the final knot underneath.
This wrapped section forms a sturdy thread stem that allows the button to sit slightly above the fabric while remaining securely attached.
Although this step adds only a minute or two, it significantly improves both functionality and durability.
Common Button Types and Best Uses
| Button Type | Common Clothing | Sewing Method |
|---|---|---|
| Two-hole button | Shirts, lightweight garments | Straight stitches between two holes |
| Four-hole button | Casual shirts, uniforms, trousers | Parallel or crossed stitch pattern |
| Shank button | Coats, blazers, jackets | Sew through built-in loop on back |
| Decorative button | Dresses, sweaters, accessories | Method depends on button construction |
Understanding these button styles makes future repairs quicker and more accurate.
Common Mistakes to Avoid
Even simple sewing projects can become less durable if a few common mistakes are overlooked.
Using thread that is too thin often results in buttons loosening prematurely, especially on heavier garments.
Choosing thread that closely matches the original stitching improves both appearance and strength.
Another frequent mistake involves placing the button in the wrong position. Even a slight misalignment can prevent the garment from closing properly.
Pulling stitches excessively tight is also problematic. Buttons need a small amount of flexibility to accommodate overlapping fabric.
Finally, tying weak finishing knots may allow the entire repair to unravel after only a few uses.
Careful attention to these details produces repairs that often last as long as the original factory stitching.
Reinforcing Loose Buttons Before They Fall Off
One of the smartest clothing maintenance habits is reinforcing buttons before they detach completely.
If a button begins wobbling or several threads appear broken, adding a few fresh stitches can prevent complete failure.
This quick repair often takes less than five minutes and helps avoid losing the original button.
Since replacement buttons don’t always perfectly match the originals, preventative maintenance preserves both the appearance and value of your clothing.
Inspecting buttons occasionally while ironing or folding garments makes these small repairs easy to identify.
Why Basic Sewing Is a Valuable Life Skill
Learning how to sew a button represents more than mastering a single clothing repair.
It introduces the confidence that comes from maintaining your belongings rather than immediately replacing them.
Basic sewing skills often lead to other practical repairs, including fixing loose hems, repairing small tears, reinforcing seams, and replacing hooks or snaps.
These abilities reduce clothing expenses while promoting a more sustainable relationship with fashion.
For professionals, travelers, students, and families alike, the ability to repair clothing quickly can save both time and inconvenience when unexpected wardrobe issues arise.
Sometimes the smallest practical skills prove surprisingly valuable throughout life.
Conclusion
Understanding how to sew a button is one of the simplest yet most useful skills anyone can learn. With only a needle, thread, and a few minutes of patience, it’s possible to restore shirts, coats, trousers, dresses, and countless other garments to full functionality.
Beyond saving money, button repair encourages a more thoughtful approach to clothing by extending the lifespan of garments that might otherwise be discarded. It also provides the satisfaction of solving everyday problems with your own hands.
Whether you’re repairing a favorite shirt before an important event or maintaining an entire wardrobe over time, sewing on a button is a timeless skill that combines practicality, sustainability, and self-reliance. Once you’ve mastered it, you’ll likely find yourself reaching for a needle instead of replacing clothing—and that’s a habit worth keeping.